

Removing premade eyelash fans is a crucial step in the eyelash extension process, whether you're a professional lash artist or someone who loves DIY lash extensions. As a supplier of premade eyelash fans, I understand the importance of providing comprehensive information on this topic. In this blog, I'll share detailed steps on how to safely and effectively remove premade eyelash fans, along with some tips and precautions.
Why Remove Premade Eyelash Fans?
There are several reasons why you might need to remove premade eyelash fans. Firstly, natural eyelashes have a growth cycle, and as they shed, the attached lash extensions will also come off. To maintain a natural and healthy look, it's necessary to remove the old extensions and apply new ones. Secondly, if the lash extensions are causing discomfort, such as itching, irritation, or redness, removing them is the best solution. Finally, some people simply want to change their lash style or take a break from wearing lash extensions.
Tools and Materials Needed
Before you start removing premade eyelash fans, gather the following tools and materials:

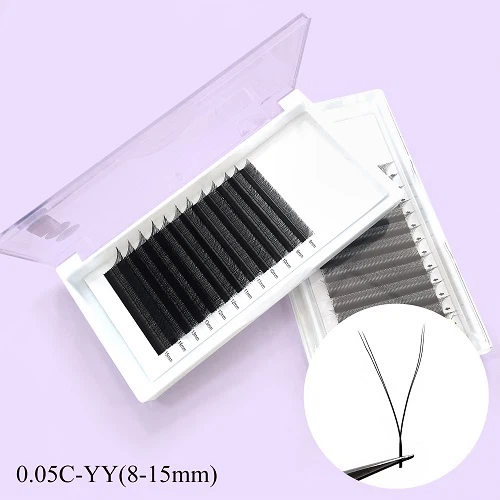
- Lash adhesive remover: Choose a high-quality adhesive remover that is specifically designed for eyelash extensions. Avoid using products that contain harsh chemicals, as they can damage your natural eyelashes and irritate your eyes. Premium Lash Extensions often come with recommended adhesive removers that are gentle and effective.
- Cotton pads or swabs: These are used to apply the adhesive remover and gently wipe away the dissolved adhesive.
- Tweezers: A pair of fine-tipped tweezers is essential for carefully removing the lash extensions one by one.
- Eye protection: Wear goggles or eye shields to protect your eyes from the adhesive remover and any loose lash extensions.
Step-by-Step Guide to Removing Premade Eyelash Fans
Follow these steps to safely remove premade eyelash fans:
- Prepare the area: Find a comfortable and well-lit place to sit or lie down. Clean your face and remove any makeup around your eyes. Put on your eye protection to prevent any irritation.
- Apply the adhesive remover: Soak a cotton pad or swab in the adhesive remover. Gently place the soaked cotton pad or swab on your closed eyelid, covering the lash extensions. Make sure the adhesive remover comes into contact with the base of the lash extensions. Leave the cotton pad or swab in place for the recommended time, usually 10 - 15 minutes. This allows the adhesive remover to break down the adhesive and loosen the lash extensions.
- Check the looseness of the lash extensions: After the recommended time has passed, gently lift the cotton pad or swab and check if the lash extensions are loose. You can use your tweezers to lightly tug on one of the lash extensions. If it comes off easily, proceed to the next step. If not, leave the cotton pad or swab in place for a few more minutes.
- Remove the lash extensions: Using your tweezers, carefully grasp the base of each lash extension and gently pull it away from your natural eyelash. Start from the outer corner of your eye and work your way inwards. Be gentle and avoid pulling on your natural eyelashes, as this can cause damage and breakage.
- Clean the lashes: Once all the lash extensions have been removed, use a clean cotton pad or swab soaked in warm water to gently clean your natural eyelashes. This helps to remove any remaining adhesive and debris.
- Moisturize the lashes: After cleaning, apply a small amount of lash conditioner or oil to your natural eyelashes. This helps to keep them healthy and hydrated.
Tips and Precautions
- Be patient: Removing premade eyelash fans takes time and patience. Rushing the process can cause damage to your natural eyelashes.
- Avoid rubbing your eyes: Rubbing your eyes can cause the lash extensions to break off unevenly and may also damage your natural eyelashes.
- Follow the instructions: Always follow the instructions provided with the adhesive remover. Different products may have different application times and methods.
- Consult a professional: If you're unsure about how to remove the lash extensions or if you experience any discomfort or irritation, it's best to consult a professional lash artist.
Different Types of Premade Eyelash Fans and Removal Considerations
There are various types of premade eyelash fans, such as Flat Eyelash and YY Lashes. Each type may require slightly different removal techniques.
- Flat Eyelashes: Flat eyelashes are thinner and more flexible than other types of lash extensions. When removing them, be extra careful not to bend or break the lashes. Use a gentle touch when applying the adhesive remover and pulling the lashes away from your natural eyelashes.
- YY Lashes: YY lashes are made up of multiple strands of lashes, which can make them a bit more challenging to remove. Make sure the adhesive remover penetrates between the strands to fully dissolve the adhesive. You may need to use a smaller cotton swab or a pointed applicator to apply the adhesive remover more precisely.
Conclusion
Removing premade eyelash fans is a process that requires care and attention. By following the steps outlined in this blog and taking the necessary precautions, you can safely remove your lash extensions without damaging your natural eyelashes. As a supplier of high-quality premade eyelash fans, I'm committed to providing you with the best products and information to ensure a positive lash extension experience.
If you're interested in purchasing our premade eyelash fans or have any questions about our products, please feel free to contact us for procurement discussions. We look forward to serving you and helping you achieve the perfect lash look.
References
- Eyelash Extension Safety Guidelines, Professional Lash Association.
- Lash Extension Care and Maintenance Manual, Leading Lash Manufacturer.